
Weathering with dummies
- Thread starter Henri
- Start date
You are using an out of date browser. It may not display this or other websites correctly.
You should upgrade or use an alternative browser.
You should upgrade or use an alternative browser.
Confused me having RTM on the side!That is not RTM. It is from the Nederlandse Spoorwegen, in the depot of the ZLSM museum in Simpelveld, Limburg (Netherlands).
I went through some old photos in search of the ‘patina’ I’m looking for to replicate and came up with these two. They also have a delicious railbus.

Two different things, although the Love/Hate bit is the same and the same shaped jars
And, they both look like axle grease.

-
 1
1
- Show all
After mondays testing (it was FUN!) I ordered a couple of Vallejo paints. I think I know the basics but run into material 'problems', als in paint not suitable for my needs, brushes too large and not the right colors. I watched more vids online and saw the techniques of using pigments. As I've never seen that before, my initial thought was: what's the use of it, now I think: you can't live without them...
Delivery should be today! Whohoooo!
Delivery should be today! Whohoooo!
 Great start Henri,looking good and welcome to the weathering clan
") ,one tip when rusting,use more than one colour brown,I use enamels and more "orangy" colours,maybe up to 3 or 4 for older rusting areas and the wash down marks from rivets/bolts and so on and finish off with rust colour,remember that old rust will also be dusty after a time,I also use a purple colour in vary small amounts to give the effect of red rust,normally around rust holes,just a tip for the future and once again well done on your efforts so far.A couple of old pics showing dusty rust and rust holes and using jusssst a spot of the various browns and purple as an example.
,one tip when rusting,use more than one colour brown,I use enamels and more "orangy" colours,maybe up to 3 or 4 for older rusting areas and the wash down marks from rivets/bolts and so on and finish off with rust colour,remember that old rust will also be dusty after a time,I also use a purple colour in vary small amounts to give the effect of red rust,normally around rust holes,just a tip for the future and once again well done on your efforts so far.A couple of old pics showing dusty rust and rust holes and using jusssst a spot of the various browns and purple as an example.


Rio
Attachments

-
 4
4
- Show all
We have not yet got round to the salt method. This works very well for showing rust in places. First job is to paint an area that you need to be rusty, that area only or around it. You let that dry then put some salt on it then spray the base coat. Wolah when that is dry you just use a stiff brush to remove the paint over the salt and the salt to give nice uneaven and sometimes flaky paint rust. The effect is stupendous.

Yes agree Jon,I have used it on model cars but not as yet on my G railroad kit,as you say it gives great results,there are a few good "how to" videos on U tube using the salt method,it works on larger scales well but I found that smaller such as OO(wash mouth out) it is a little overpowering but must say again I am in total agreement with you on this one.We have not yet got round to the salt method. This works very well for showing rust in places. First job is to paint an area that you need to be rusty, that area only or around it. You let that dry then put some salt on it then spray the base coat. Wolah when that is dry you just use a stiff brush to remove the paint over the salt and the salt to give nice uneaven and sometimes flaky paint rust. The effect is stupendous.
.-
1
- Show all
Still learning how all the stuff reacts on each other. I do like the seriously rusted chassis. Tomorrow it will get a wash with ‘rust’. Again.
On the cassis I first added paint in spots that have to show rust. Then I thinned the paint 50% and covered almost everything with it, trying to have more here and less there. Last phase I used a wet brush with short hairs and removed some paint here and there, so the black shows through.


The flatbed is quite a thing. You should think it is easy, but it isn’t. At least I find it difficult to achieve the texture I’m after. Tomorrow I’ll ad a dark gray wash to fill all lower area’s. On the outside all iron is rusted. Yes, it is a well abused and not maintained wagon!

-
2
- Show all
Looking good so far Henri, all look like they've been worked hard on a real railway ")
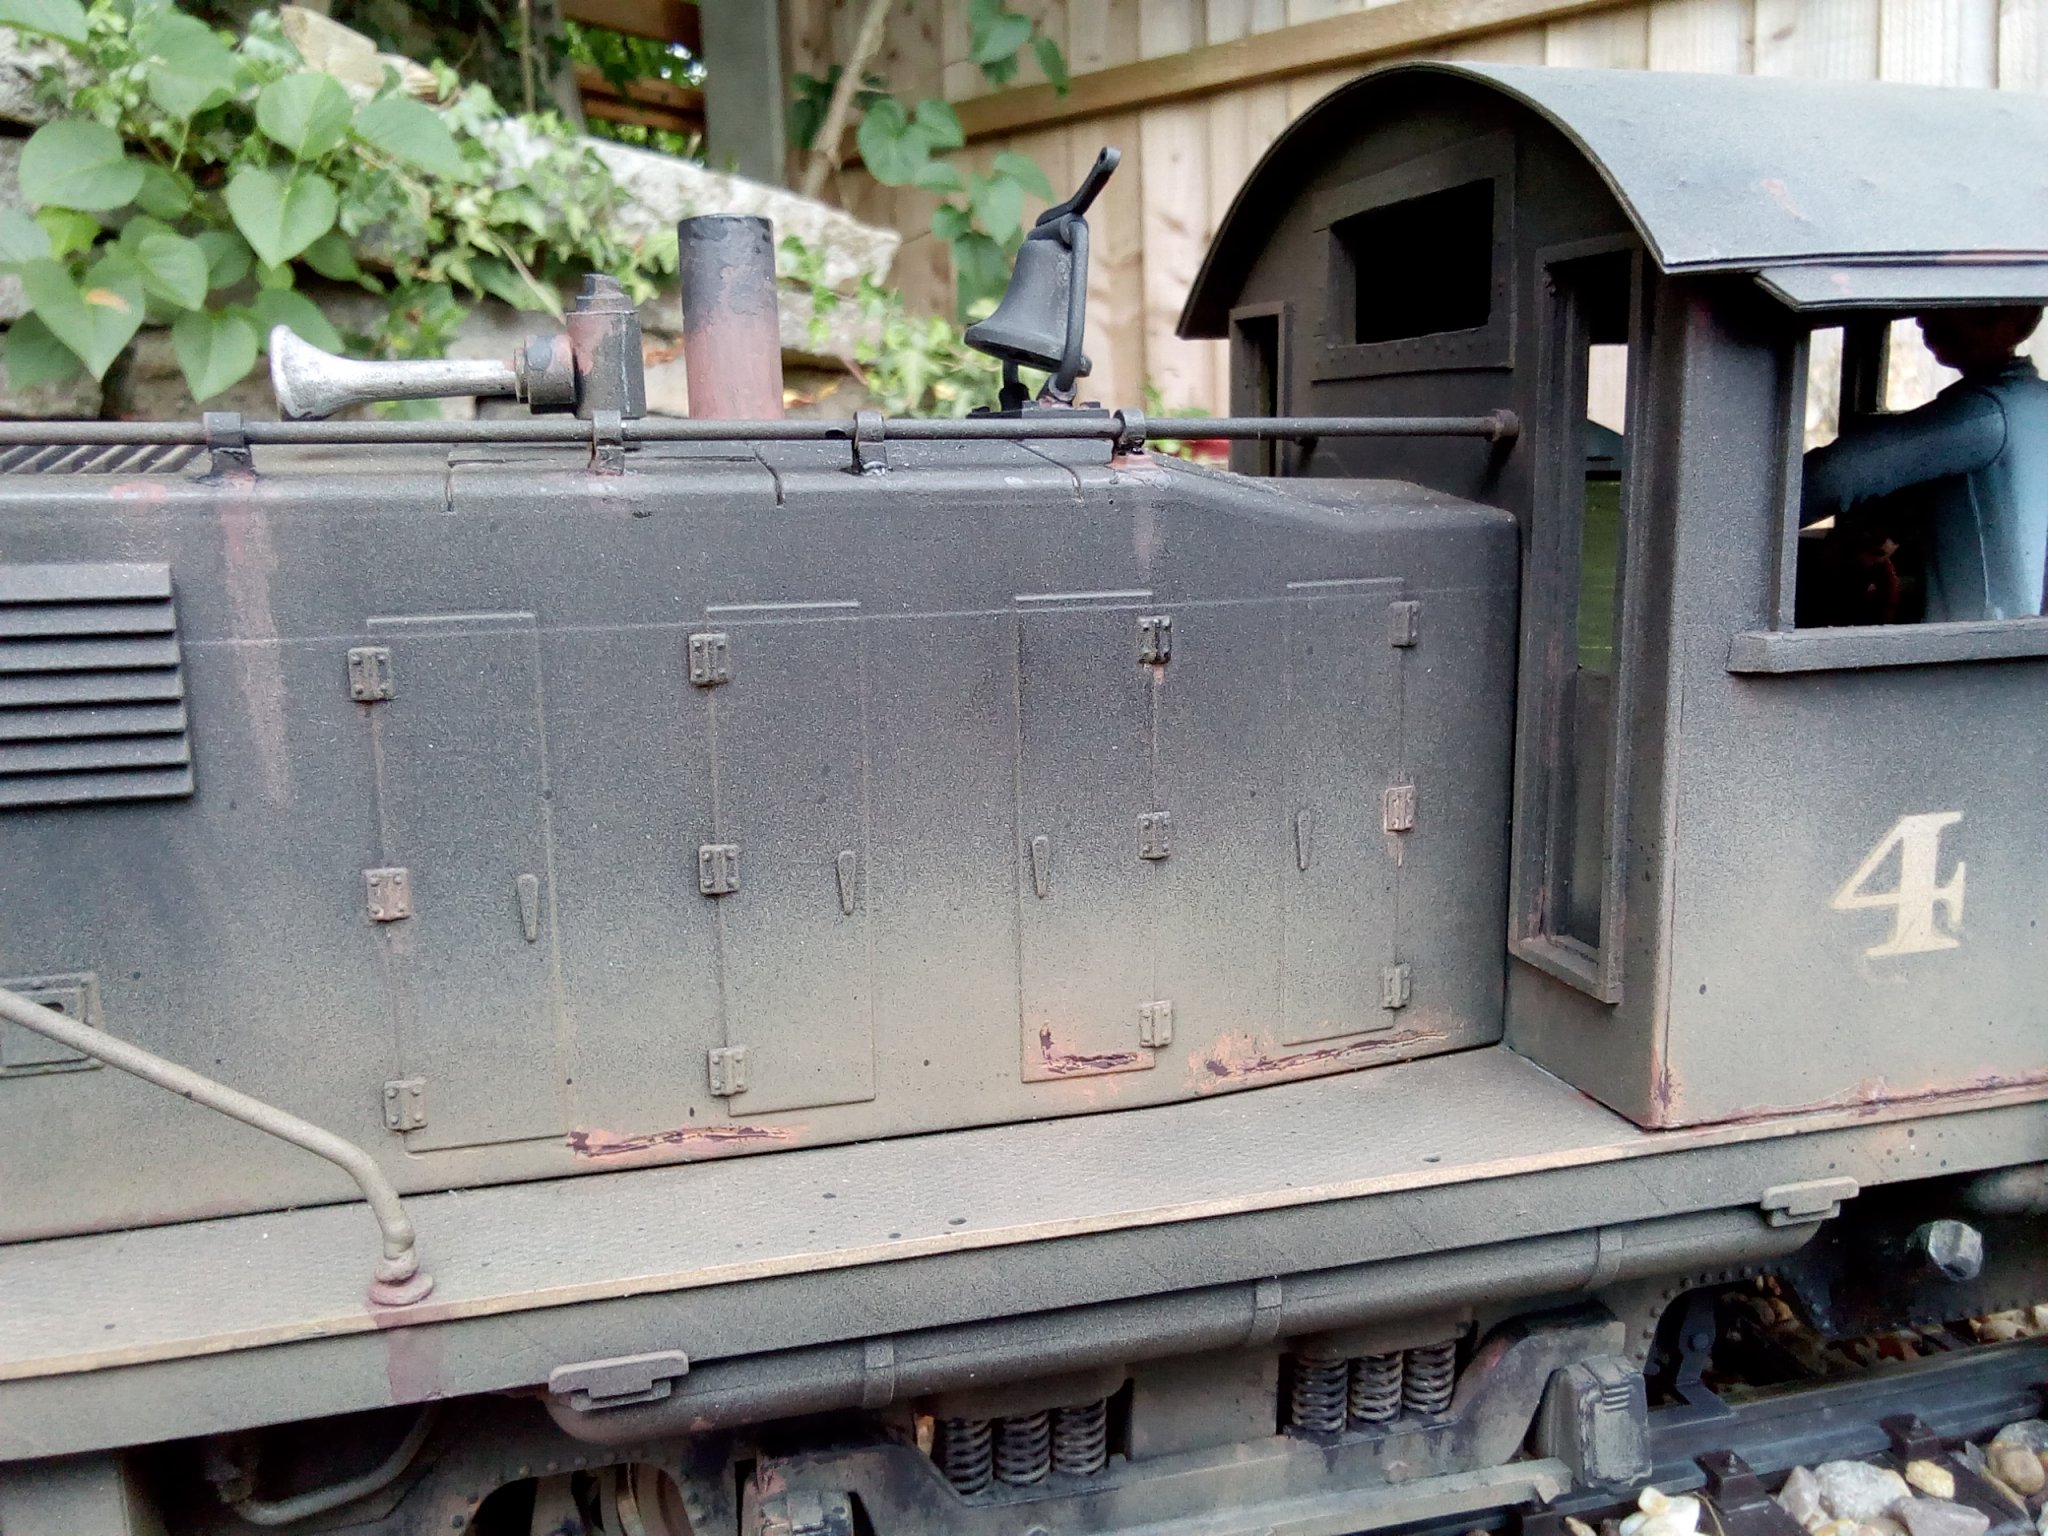
I had a go at weathering an old OO gauge body (it had bravely laid down its chassis for another project) with artist's oil paints. There's no relief detail from rivets or anything on the tank sides so I was wondering how effectively I could actually get grime onto the surface in a convincing way. The major difference found with oils is how long they take to dry. It can be useful in that it gives you a lot of time to rework the surface or remove it all while it's still wet. However it means that you have to be really careful handling it for a day or so after. The extra time to dry and the ease with which it can be removed made me think this could be quite a useful way to start trying to add muck to some locos.
The tools required: 1 old brush for application; 1 nicer soft brush for working the paint; a jar of white spirits and oil paints. What I also used but forgot to include is cotton ear buds.

Firstly the colours are splodged onto the surface. I was expecting the grey to be a lighter shade than it actually was, in reality it wasn't much brighter than the satin black of the tanks. This is using the old brush, as it is not kind to the bristles. I used the brown around the edges, where if it was lighter, it might have highlighted some of the nooks and crannies around the edges of the tanks like trapped dirt. The grey was concentrated on the bulk of the surface to tone down the black.

Using a soft flat brush, a small amount of white spirit (or other thinners) was brushed onto the surface, streaking the oil paints in the down the surface. The same technique was used on the tops of the tanks, except here more pooling occurs. It can be seen on the footplate edge at the bottom of the tank, how this causes the paint to build up.

After this the bulk of the paint is removed using a cotton bud. I would probably use a tissue or a kitchen towel for something G-scale. Again this process starts at the top and works vertically down, right from the top of the tank to the bottom in each pass. Not too much of the colour remains but it leaves some streaking and takes away the flatness and the cleanliness of the surface. Once I had done the whole surface and it had dried over a couple of hours I used a clean dry bud to buff away the paint over the crest and number, like on a few photos I had seen where the crew had wiped the number clean.


Finally after everything had spent a day drying I buffed the lot up with a large soft brush to remove the hard edges on the streaks. Some lighter grey acrylics were dry brushed on to highlight where the tank fillers might spill over the top. I think the whole effort might have been more pronounced if I started with lighter colours, the overall effect is quite subtle and the camera seems to struggle to pick it up. Comparing it with the unaltered side (and where I hadn't done anything to the bolier) I think shows what i was trying to achieve, not a locomotive at the end of it's life but that works daily and isn't cleaned. Just enough to add some texture to the big flat sides and to stop the satin black looking clean, polished and new. Once i'm a little happier with the technique the 2MT in the background will be the first working loco to receive the same treatment.

The untouched side:

I had a go at weathering an old OO gauge body (it had bravely laid down its chassis for another project) with artist's oil paints. There's no relief detail from rivets or anything on the tank sides so I was wondering how effectively I could actually get grime onto the surface in a convincing way. The major difference found with oils is how long they take to dry. It can be useful in that it gives you a lot of time to rework the surface or remove it all while it's still wet. However it means that you have to be really careful handling it for a day or so after. The extra time to dry and the ease with which it can be removed made me think this could be quite a useful way to start trying to add muck to some locos.
The tools required: 1 old brush for application; 1 nicer soft brush for working the paint; a jar of white spirits and oil paints. What I also used but forgot to include is cotton ear buds.
Firstly the colours are splodged onto the surface. I was expecting the grey to be a lighter shade than it actually was, in reality it wasn't much brighter than the satin black of the tanks. This is using the old brush, as it is not kind to the bristles. I used the brown around the edges, where if it was lighter, it might have highlighted some of the nooks and crannies around the edges of the tanks like trapped dirt. The grey was concentrated on the bulk of the surface to tone down the black.
Using a soft flat brush, a small amount of white spirit (or other thinners) was brushed onto the surface, streaking the oil paints in the down the surface. The same technique was used on the tops of the tanks, except here more pooling occurs. It can be seen on the footplate edge at the bottom of the tank, how this causes the paint to build up.
After this the bulk of the paint is removed using a cotton bud. I would probably use a tissue or a kitchen towel for something G-scale. Again this process starts at the top and works vertically down, right from the top of the tank to the bottom in each pass. Not too much of the colour remains but it leaves some streaking and takes away the flatness and the cleanliness of the surface. Once I had done the whole surface and it had dried over a couple of hours I used a clean dry bud to buff away the paint over the crest and number, like on a few photos I had seen where the crew had wiped the number clean.
Finally after everything had spent a day drying I buffed the lot up with a large soft brush to remove the hard edges on the streaks. Some lighter grey acrylics were dry brushed on to highlight where the tank fillers might spill over the top. I think the whole effort might have been more pronounced if I started with lighter colours, the overall effect is quite subtle and the camera seems to struggle to pick it up. Comparing it with the unaltered side (and where I hadn't done anything to the bolier) I think shows what i was trying to achieve, not a locomotive at the end of it's life but that works daily and isn't cleaned. Just enough to add some texture to the big flat sides and to stop the satin black looking clean, polished and new. Once i'm a little happier with the technique the 2MT in the background will be the first working loco to receive the same treatment.
The untouched side:
-
5
- Show all
Update on my wagon project. The last pictures showed the first steps of weathering on the model. Yesterday I went a bit further. I washed the model with dark gray to get all the lower spots filled with a dark color, and later I mixed up some paint with which I achieved this whitish/grayish chaulcy look wood can have if it has been unproteced to sun and rain for years. I think I achieved this.
The rusted frame is wonderful, but I still think it looks ‘too new’. Cannot exactly say what my problem is with it...


The rusted frame is wonderful, but I still think it looks ‘too new’. Cannot exactly say what my problem is with it...


-
4
- Show all
Thanks Paul, grease is missing indeed! The buffers, bearings and ‘sliding journals’ in the suspension.
Lighter rust: gotta try!
Lighter rust: gotta try!
Paradise seems to think Marmite............grease is missing indeed!
(Post 24)
HAHAHA!!! I better get me a jar! Not even sure they sell it over here, although a former co-worker used it on everything during lunch.
You are certainly getting the hang of it. Only time for a bit of Gloss is tiny bits of Black to represent grease as Paul suggests. Next perhaps that subtle little bit of dry brush Matt White on the under frame may be just what you are looking for, but so little that it barely shows just highlights the edges. Perhaps a little on the body as well, practice again on a piece of card you do not want to overdo it though I have in my Piko 25 tonner to show work in an environment where white/light dust is present
-
1
- Show all
